How to Remove a Ceiling Fan: A Step-by-Step Guide
If you’ve decided it’s time to replace your ceiling fan or perhaps make room for a new lighting fixture, knowing how to remove a ceiling fan is a vital skill. By executing this project yourself, you can save money and feel proud of yourself for completing a home improvement project. To ensure electrical safety and correct handling of the wire, we’ll walk you through the process of removing both flush-mount and down-rod ceiling fans in this article. Prior to delving into the specific procedures, let us address the fundamental query: How is a ceiling fan removed?
Key Takeaways
- Main Focus: Removing a ceiling fan, including both flush-mount and down-rod styles.
- Key Steps: Turning off power, removing blades, disconnecting wires, unscrewing mounting screws, and lowering the fan.
- Safety: Emphasizes electrical safety precautions and the importance of working with an electrician if necessary.
- Variations: Differentiates between flush-mount and down-rod ceiling fans and their specific removal processes.
Answering the Key Question
To remove a ceiling fan, follow these basic steps:
- Turn off power: Ensure your safety by turning off the power to the ceiling fan at the circuit breaker.
- Remove blades: Use a screwdriver to take off the fan blades.
- Disconnect wires: Carefully disconnect the wiring, making note of the connections.
- Unscrew mounting screws: Locate and remove the mounting screws securing the fan to the ceiling.
- Lower fan: Gently lower the fan and detach it from the ceiling.
- Safety chain: If your fan has a safety chain, detach it from the ceiling to complete the removal process.
Now, let’s explore each step in detail for both flush-mount and down-rod ceiling fans.
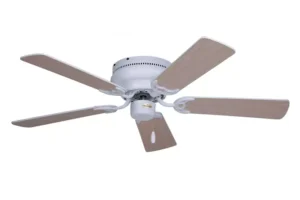
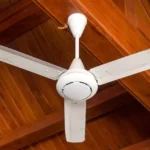
Removing a Flush-Mount Ceiling Fan
Step 1: Turn Off Power
Safety is paramount when dealing with electrical components. Before you begin, switch off the power to the ceiling fan at the circuit breaker. Confirm that the fan is no longer operational by attempting to turn it on.
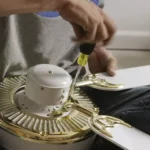
Step 2: Remove Blades
- Use a ladder to reach the fan.
- Carefully unscrew each blade from the fan motor.
- Place the screws in a container to avoid misplacement.
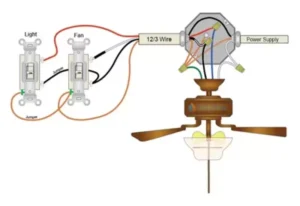
Step 3: Disconnect Wires
- Expose the wiring by removing the cover plate.
- Identify and label each wire with tape for easy reconnection.
- Disconnect the wires using pliers.
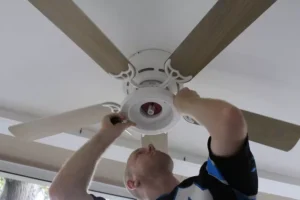
Step 4: Unscrew Mounting Screws
- Locate the screws securing the fan to the ceiling bracket.
- Use a screwdriver to remove these screws.
- Keep one hand on the fan to prevent it from falling.
Step 5: Lower Fan
Gently lower the fan from the ceiling bracket. Enlist the help of a friend if the fan is heavy.
Step 6: Safety Chain
If your flush-mount ceiling fan is equipped with a safety chain, detach it from the ceiling bracket. This ensures the fan is completely free.
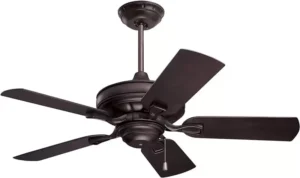
Removing a Down-Rod Ceiling Fan
Step 1: Turn Off Power
Follow the same safety precautions as mentioned for flush-mount ceiling fans.
Step 2: Remove Blades
Use a ladder to reach the fan. Carefully unscrew each blade from the fan motor and place the screws in a container.
Step 3: Disconnect Wires
Expose the wiring by removing the cover plate. Identify and label each wire with tape for easy reconnection. Disconnect the wires using pliers.
Step 4: Unscrew Mounting Screws
Locate the screws securing the fan to the down rod. Use a screwdriver to remove these screws. Keep one hand on the fan to prevent it from falling.
Step 5: Lower Fan
With the mounting screws removed, lower the fan from the down rod. This may require some assistance, especially if the fan is heavy.
Step 6: Safety Chain
If your down-rod ceiling fan has a safety chain, detach it from the down rod. This step ensures the fan is entirely separated.
Electrical Safety and Wiring
Whether dealing with a flush-mount or down-rod ceiling fan, electrical safety is crucial. Here are some additional tips:
- Double-check the power: Use a voltage tester to ensure the power is indeed off before touching any wires.
- Take pictures: Before disconnecting wires, take pictures of the current wiring setup. This can be a helpful reference during reinstallation.
- Secure wires: After disconnecting the wires, use wire nuts to cap each wire individually. This prevents accidental contact and ensures safety.
Conclusion
Removing a ceiling fan can be a straightforward DIY task if done with care and attention to detail. By following the steps outlined above for both flush-mount and down-rod fans, you can safely and successfully remove your ceiling fan. Remember to prioritize electrical safety, label wires for easy reconnection, and seek assistance for heavy fans. With this guide, you’ll be well on your way to upgrading your space with a new lighting fixture or fan of your choice.