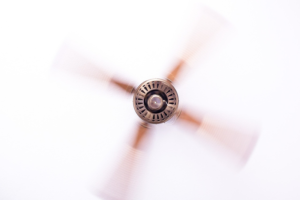
The soothing breeze of a noisy ceiling fan – until it starts offevolved making obnoxious noises that shatter your tranquility. whether or not it’s a whining whir, an ominous rattle, or a ghostly humming, a noisy ceiling fan is the final factor you need disrupting your peace at domestic. But fear not! This guide will walk you through simple DIY fixes to silence that ruckus and reclaim your quiet sanctuary.
Common Causes of a Noisy Ceiling Fan
Before we dive into solutions, let’s understand what might be causing that racket:
- Bad Bearings: Inside the fan’s motor housing, tiny ball bearings support the rotating shaft . whilst those bearings wear out, you may hear grinding, scraping, or damn sounds.
- Loose or Misaligned Blades: Improperly tightened or crooked fan blades can wobble and knock towards each different or the motor housing, creating tapping or knocking noises.
- Dust Buildup: A layer of dirt on the blades creates an imbalance, inflicting the fan to vibrate and potentially squeak or whine as it spins.
- Worn Mounting hardware: free screws or worn elements inside the putting bracket or mild package can allow motion, main to rattling or unstable wobbling.
- Faulty Capacitor: The fan’s capacitor regulates the motor’s electrical flow. A failing capacitor produces an electrical buzzing or humming sound.
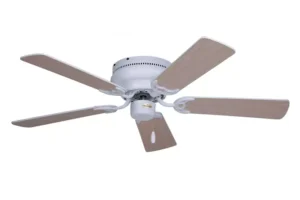
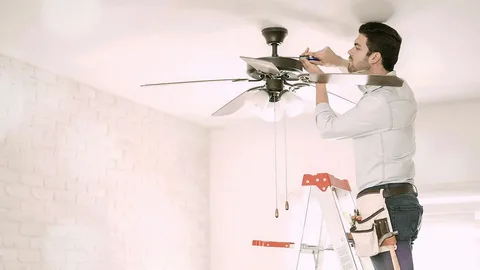
Quick Fix #1 – Clean and Tighten the Blades
one of the simplest and only approaches to quiet a noisy ceiling fan is to present the blades an awesome cleansing and ensure they are securely tightened. right here’s how:
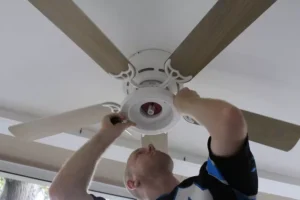
- Turn Off Power to the Fan at the circuit breaker for safety.
- Use a step ladder or stool to get entry to the fan blades. you can want to remove the light package for higher access.
- Test each blade for dirt buildup or caught-on debris. Use a dry cloth or vacuum attachment to gently wipe down the blades on each sides.
- appearance closely at every blade to peer if any seem crooked, deformed, or misshapen as compared to the others. these might also want replacement.
- discover the screws or bolts protecting every blade arm to the motor housing. Use a wrench or screwdriver to tighten each one, being cautious now not to over-tighten.
- Once secured, gently spin each blade arm to check for any remaining wobble or unevenness. Make minor adjustments as needed.
- If blade imbalance remains an issue, you may need to use a balancing kit with adhesive weights.
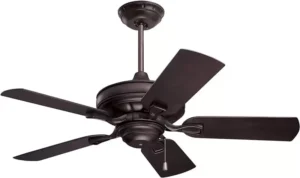
Quick Fix #2 – Check and Tighten Mounting Hardware
Another common source of noisy ceiling fans is loose or worn mounting hardware. Take these steps:
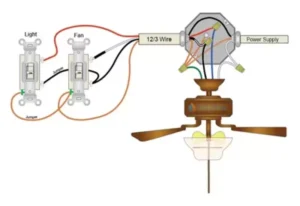
- Turn Off Power again for safety. Use a flashlight to inspect the area where the hanging bracket mounts to the electrical box in the ceiling.
- Locate and tighten any loose screws securing the hanging bracket using a screwdriver. The bracket should be solidly attached with no wiggle room.
- If your fan has a light kit, check that it’s also firmly secured to the motor housing and tighten any loose connections.
- For fans with a downrod, make sure the downrod mounting screws into the motor housing are tight and the downrod ball is seated properly.
- If any screws seem stripped or won’t tighten fully, consider replacing lockwashers or using thread-locking compound.
With the blades cleaned, tightened, and the mounting hardware secured, your fan should be running much more smoothly and quietly.
When Basic Fixes Don’t Work
If cleaning, tightening, and checking the mounting doesn’t solve your noisy ceiling fan issue, the culprit may be internal components like the motor bearings or capacitor. These repairs are more involved:
Replacing Noisy Bearings in the Motor Housing.
The motor’s ball bearings allow the rotor shaft to spin with little friction. however over years of use, these bearings can put on out and make screeching, grinding, or gravelly noises. here’s the way to update them:
- Disconnect energy to the fan at the circuit breaker and make certain it can’t by chance be became again on.
- dispose of the fan blades and motor housing to get admission to the stator (desk bound component) and rotor (rotating part) of the motor.
- carefully pry out the old ball bearings from the rotor shaft the use of a bearing puller or hooked gear, being very mild to keep away from negative the shaft.
- clean out any particles or residue from the bearing races.
- Apply a dab of bearing grease to the new bearings and races.
- Gently tap the new sealed ball bearings into place using an appropriately-sized bearing installation tool or socket.
- Reassemble the rotor back into the stator housing, reconnect wiring, and test run the fan.
With fresh, properly lubricated bearings installed, those grinding motor noises should be history.
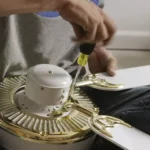
Swapping Out a Faulty Fan Capacitor
Maximum ceiling fans depend upon a small cylindrical capacitor to provide the initial rotational torque to begin the motor spinning. when a capacitor begins failing, you will frequently hear an electrical humming, whirring, or humming sound. here’s the way to update it correctly:
- Turn Off Power to the fan circuit at the breaker box for your safety.
- Remove the fan blades and motor housing to access the capacitor, which may be housed separately or mounted directly on the motor housing.
- Discharge the Capacitor fully by shorting out the terminals with an insulated screwdriver or capacitor discharge tool to avoid risk of shock.
- pay attention to the capacitor’s rating (microfarad and voltage) and buy an actual alternative from the fan producer or electric supplier.
- Disconnect the old capacitor’s wiring, cast off it, and installation the new one securely in its region following any producer commands.
- Reconnect all wiring as it was originally, double-checking the capacitor’s polarity if marked.
- Reassemble the fan motor housing, blades, and any other components you removed.
- Turn power back on and test run the fan, listening for any more humming that would indicate the new capacitor has solved the noise issue.
With a fresh start capacitor installed, that electrical buzzing should be silenced and your fan should spin up smoothly and quietly.
When to Call In a Professional
While the fixes above solve many common ceiling fan noise complaints, there are instances where professional repair is advisable:
– If you feel uncomfortable working with your fan’s electrical wiring and connections
– If disassembling the motor housing seems overly complex for your skill level
– If the fan still makes concerning noises after your attempted repairs
– If visible damage to components like warped blades or a failing motor exists
A certified electrician or appliance repair specialist can properly diagnose persisting issues and ensure your ceiling fan is restored to safe, quiet, and reliable operation.
Conclusion
No one should have to suffer through the persistent drone of a noisy ceiling fan at home. By following this guide’s advice for cleaning, tightening, balancing the blades, securing mounting hardware, replacing worn bearings or a faulty capacitor, you can hopefully restore blessed silence.
If the simple fixes don’t do the trick or you come across something beyond your DIY abilities, do not hesitate to call in an expert. due to the fact on the stop of the day, you deserve to enjoy the cooling airflow and calming environment a quiet, smoothly-operating noisy ceiling fan affords on your personal oasis.